
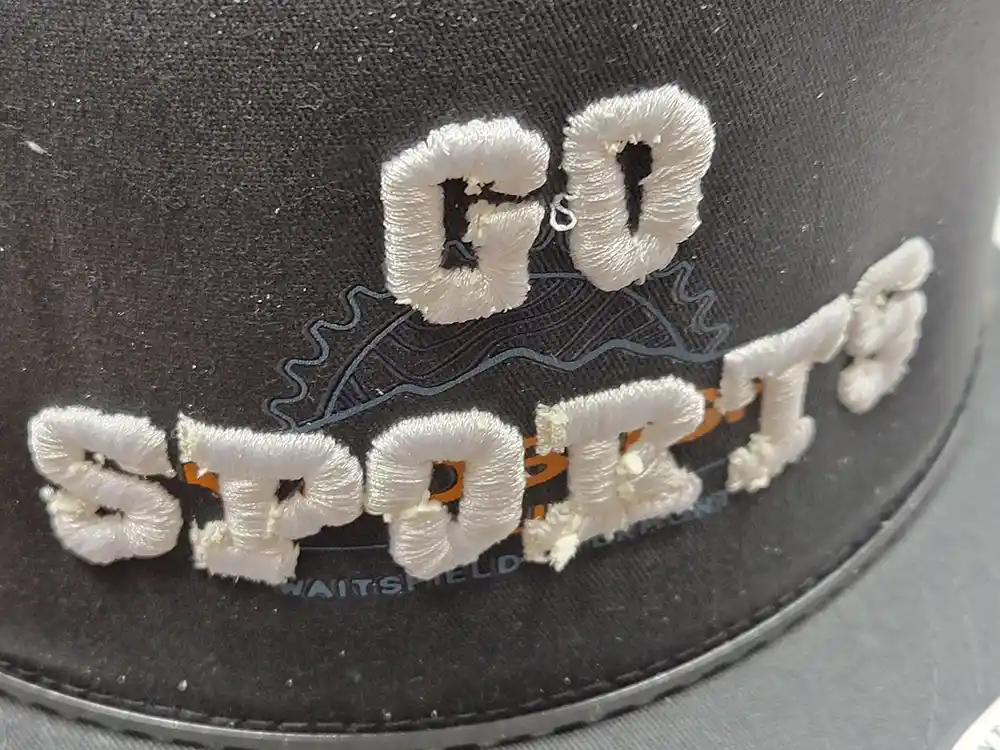
3D Puff Embroidery is a popular technique that adds depth and texture to embroidered designs, giving them a raised, three-dimensional effect. It’s particularly favored on Caps and Hats, adding a bold, standout element to logos or text. However, it comes with its own set of challenges, as seen in the images above. The issues highlighted are missing parts of the embroidery, lost stitches, and puff escaping from the embroidered areas. These problems often stem from improper digitizing of the design.
In this blog, we’ll break down the common causes of these issues, particularly focusing on digitizing mistakes, and offer solutions to help you achieve flawless 3D puff embroidery.
The Issue: Stitch Loss and Puff Displacement
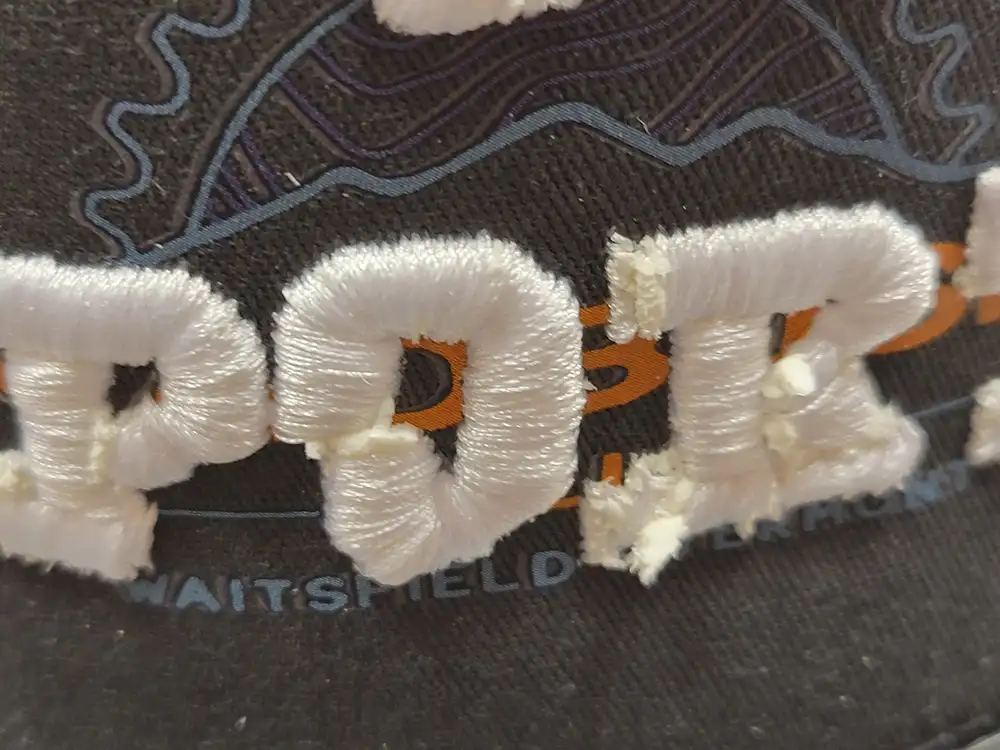
As the images show, the embroidery has significant gaps, missing stitches, and an uneven puff effect, which disrupts the overall quality of the design. Specifically:
- Lost stitches: There are areas where the thread is either loose or missing altogether, affecting the clarity of the letters and shapes.
- Puff escape: The foam used for the 3D puff effect is not fully enclosed, leading to a ragged appearance with parts of the foam sticking out.
- Inconsistent thickness: The puffing effect appears uneven, indicating that the design was not adequately prepared for the 3D puff embroidery.
The Causes: Digitizing Errors
Digitizing is the process of converting a design into a file that an embroidery machine can read and interpret. For 3D puff embroidery, this process is even more critical due to the added layer of foam that requires careful planning. Here are the primary digitizing issues that might have caused the problems seen in the images:
- Improper Stitch Sequencing: In 3D puff embroidery, the stitch order matters significantly. If the underlay stitches, which provide the foundation for the rest of the design, are not properly set, it can lead to uneven tension, causing missing stitches. A poorly sequenced design can also cause areas of the puff foam to pop out.
- Insufficient Stitch Density: For 3D puff, the top layer of stitching must be dense enough to compress the foam, giving it a clean, raised appearance. In the images, the loose and missing stitches indicate that the design was not digitized with sufficient density. Too few stitches will not properly enclose the foam, leading to visible gaps and an unfinished look.
- Inconsistent Puff Thickness Consideration: The puff foam comes in various thicknesses, and the digitized file must account for this. If the foam thickness is not properly factored into the stitch length and tension settings, it can result in parts of the foam not being compressed properly, leading to irregular puff effects or the foam escaping from under the stitches.
- Inadequate Compensation for Shrinkage: When stitching, fabric shrinkage can occur, especially with thicker foams. If the design isn’t digitized with the proper compensation, this shrinkage will affect the alignment of the stitches, resulting in incomplete coverage.
The Solutions: How to Fix and Prevent These Issues
To ensure 3D puff embroidery turns out well, it is crucial to follow best practices during the digitizing process.
- Correct Stitch Sequencing: Begin by ensuring that the underlay stitches are correctly placed to form a stable foundation. The sequence should be optimized so that the foam is completely covered by the top stitching. This will prevent the foam from escaping through the gaps.
- Increase Stitch Density: For 3D puff, a higher stitch density is essential. The stitches must be tight enough to perforate and compress the foam. The use of satin stitches is recommended for 3D puff designs because they provide smooth, uniform coverage that effectively secures the foam.
- Consider Foam Thickness in the Design: Ensure the design is digitized with the correct foam thickness in mind. Thicker foam will require longer and denser stitches to ensure proper coverage. Adjust stitch tension and length accordingly to balance the foam’s expansion under the embroidery.
- Use Puff-Specific Digitizing Techniques: Techniques like capping and over-sewing help create sharp edges and prevent puff from escaping the design. By slightly overlapping the edges of the stitches, you can avoid gaps in the finished embroidery.
- Test the Design: Before running a full production run, always test the design on a sample. This will allow you to check for any stitch gaps, misalignments, or puff escape issues and adjust your digitized file as needed.
Conclusion
3D Puff Embroidery offers a striking, textured look that can significantly enhance designs, especially on caps and hats. However, without proper digitizing, issues like missing stitches, puff displacement, and uneven coverage can arise, as shown in the images. The key to avoiding these problems lies in the digitization process. Correct stitch sequencing, adjusting stitch density, accounting for foam thickness, and running tests are crucial steps in ensuring high-quality 3D puff embroidery.
If you’re experiencing similar issues with your embroidery, take a closer look at your digitized files and make the necessary adjustments. As always, working with a professional digitizer who understands the nuances of 3D puff embroidery can make a big difference in achieving a polished and professional result.